English
 français
 Deutsch
 русский
 italiano
 español
 português
 العربية
 日本語
日本語 Polski
 中文
中文
How can we help you
You can contact us at any way that is convenient for you. We are available at 24 hours/7 days via email or telephone.
Contact Us
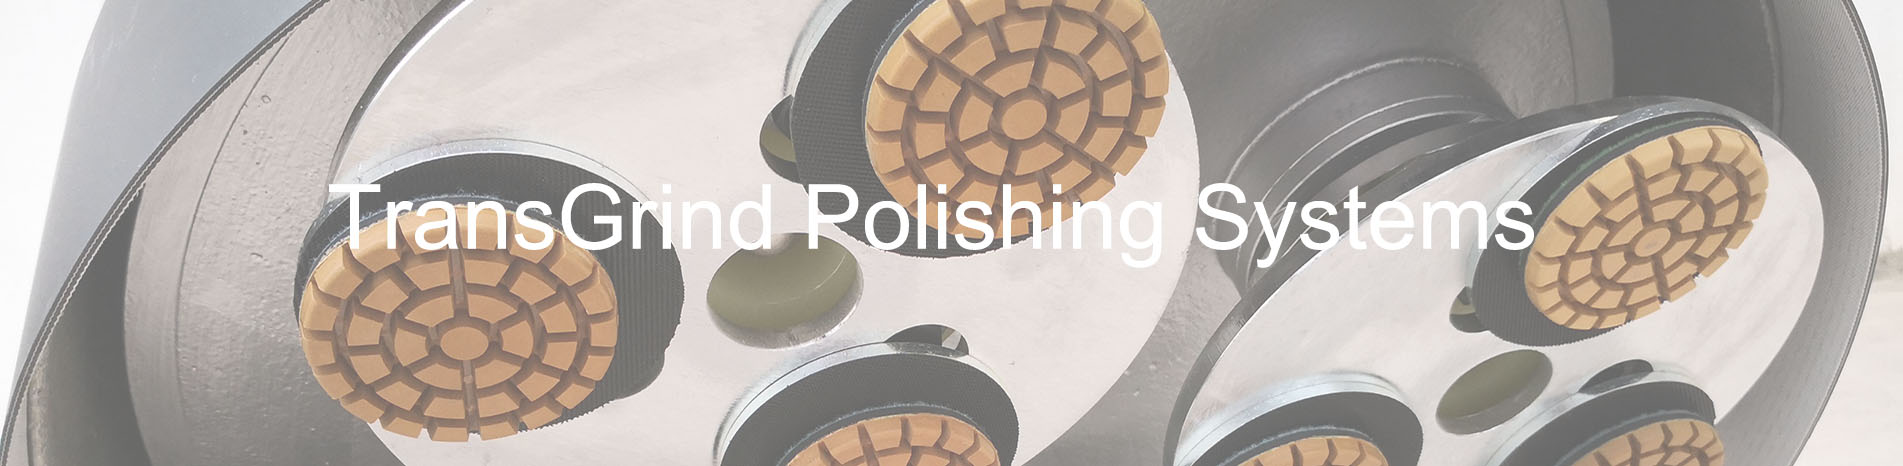
Low concrete floor grinding efficiency can be caused by several factors, including incorrect diamond tool selection, unsuitable bond hardness, excessive or insufficient machine pressure, improper speed, and the actual condition of the concrete. A diamond grinding tool that performs well on one floor may work very differently on another. Before changing tools or increasing machine pressure, it is important to identify what is limiting the grinding process.
Is the Diamond Tool Suitable for the Concrete?
One of the first things to check is whether the diamond grinding tool matches the concrete condition. Diamond tools are designed with different bond formulations and diamond specifications for different applications.
Concrete hardness is particularly important when selecting the bond. A softer bond is generally more suitable for harder concrete because it wears more readily and exposes fresh diamond particles. A harder bond is usually better suited to softer or more abrasive concrete because it can reduce excessive bond wear.
If the bond is not suitable, the tool may either wear too quickly or fail to expose fresh diamonds effectively. In both cases, grinding efficiency can suffer.
Can the Tool Become Glazed?
Glazing is another common reason for poor grinding performance. It can occur when the bond is too hard for the concrete or when the diamonds are no longer being exposed effectively.
When a diamond tool becomes glazed, the surface may appear smooth or shiny, while material removal becomes noticeably slower. Simply applying more pressure is not always the best solution. The problem may be related to bond selection, concrete characteristics, or operating conditions.
Is the Machine Pressure Appropriate?
Machine pressure affects how effectively the diamonds engage with the concrete, but more pressure does not automatically mean faster grinding.
Excessive pressure can increase tool wear, heat, and machine load without providing a proportional increase in material removal. On the other hand, insufficient pressure may not allow the tool to work effectively, particularly during heavier grinding stages.
The appropriate pressure depends on the machine, tooling, concrete condition, and grinding stage. It should be adjusted based on actual grinding performance rather than using maximum pressure as a general solution.
Is the Grinding Speed Correct?
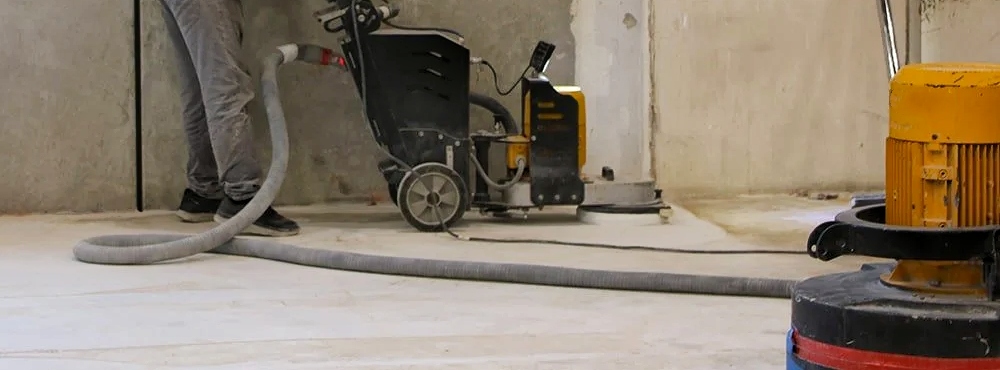
Machine speed can also affect grinding efficiency. There is no single speed that works for every concrete floor or every diamond tool.
If the speed is too high or too low for the particular machine and tooling, material removal may become less efficient. The correct operating speed should be within the tool and grinder manufacturer's recommended range and should provide stable contact between the tooling and the floor.
Speed should also be considered together with tool diameter, segment design, machine power, and the condition of the concrete.
Could the Concrete Condition Be the Problem?
The floor itself can have a major influence on grinding efficiency. Concrete hardness, aggregate type, surface condition, and the amount of material that needs to be removed can all affect how a tool performs.
For example, a floor with hard aggregate may require a different bond or grinding approach from a softer concrete surface. A floor with a thick coating or adhesive residue may also require specialized PCD removal tooling before conventional concrete grinding can proceed efficiently.
This is why changing to a more aggressive grit is not always the right answer. The tool needs to match the material being removed.
Does the Grit Match the Grinding Stage?
Using an unsuitable grit can also reduce productivity. Coarser diamond grits are generally used when greater material removal is required, while finer grits are used as the surface becomes more refined.
Starting with a grit that is too fine for a rough or uneven floor can make the initial grinding stage unnecessarily slow. However, simply choosing the coarsest available grit is not always appropriate either. The right starting grit depends on the amount of material that needs to be removed and the condition of the floor.
How Can I Improve Concrete Grinding Efficiency?
Start by checking the basic factors rather than immediately increasing machine pressure or changing to a coarser tool. Confirm that the diamond tooling is appropriate for the concrete, the bond is suitable, the machine is operating within the recommended range, and the pressure and speed are appropriate for the current grinding stage.
It is also useful to observe the tool during operation. Excessive wear, glazing, uneven wear, heat, or inconsistent material removal can provide clues about what needs to be adjusted.
Efficient concrete grinding is the result of matching the tooling and operating conditions to the floor, rather than relying on a single setting. With the right concrete grinding tools, suitable bond selection, and proper machine operation, contractors can achieve more consistent material removal while avoiding unnecessary tool wear and downtime.
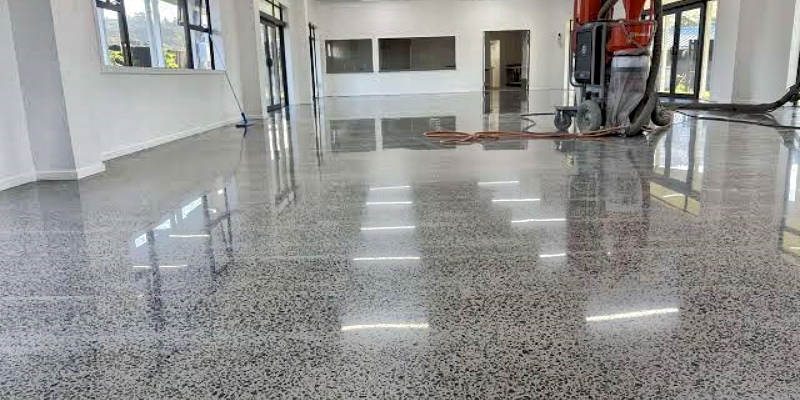
The main difference between grinding and polishing is the purpose of the process. Concrete grinding is mainly used to remove material, level the surface, and prepare the floor, while concrete polishing focuses on refining the surface to achieve a smoother appearance, better clarity, and the desired level of gloss. In many projects, grinding is the preparation stage before polishing begins.
Although they are different processes, grinding and polishing are closely connected. A successful polished concrete floor usually depends on proper grinding and surface preparation in the earlier stages.
What Is Concrete Grinding?
Concrete grinding is the process of using diamond abrasives to remove surface materials and improve the condition of a concrete floor.
Grinding is commonly used for:
During grinding, contractors typically use metal bond diamond tools because they are designed for efficient material removal and surface correction.
The main goal of grinding is not to create a final polished appearance. Instead, it creates a suitable surface condition for the next stage of the project.
What Is Concrete Polishing?
Concrete polishing is a process that uses progressively finer diamond abrasives to refine the concrete surface and create a smoother, more finished appearance.
During polishing, the focus shifts from heavy material removal to surface refinement.
Polishing can improve:
Resin bond diamond polishing pads are commonly used during the polishing stages because they are designed to refine the scratch pattern left from previous grinding steps and gradually improve the surface finish.
Can You Polish Concrete Without Grinding?
In most cases, some level of grinding or surface preparation is required before polishing.
Concrete floors often have surface irregularities, coatings, or scratches that need to be removed before polishing can achieve consistent results.
Skipping proper grinding may leave:
The amount of grinding required depends on the existing floor condition and the final result required.
Are Grinding and Polishing Using the Same Tools?
Not usually.
Different stages require different types of diamond tooling.
For example:
The correct tool selection depends on factors such as concrete hardness, grinding stage, and the desired surface finish.
Using the right diamond tools for each stage helps improve efficiency and achieve better results.
Which Process Should Be Done First?
For polished concrete projects, grinding normally comes before polishing.
A typical process may include:
The exact process can vary depending on the floor condition, project requirements, and the desired appearance.
Choosing the Right Process for Your Concrete Floor
Grinding and polishing serve different purposes, but both are important parts of achieving a high-quality concrete floor finish. Grinding prepares the surface by removing unwanted material and correcting imperfections, while polishing refines that surface to create the final appearance.
Choosing the correct concrete grinding tools and polishing system for each stage helps contractors achieve more consistent results, improve efficiency, and create a surface that meets the project requirements.
There is no single grinding speed that works for every concrete floor. The right speed depends on the grinder, diamond tool, concrete condition, and grinding stage. In general, the machine should run at a speed that allows the diamonds to maintain effective contact with the concrete and remove material consistently without generating excessive heat, vibration, or premature tool wear.
Machine speed and grinding results are closely related, so changing the speed can sometimes improve performance when a tool is not working as expected.
Does a Higher Speed Grind Concrete Faster?
Not necessarily.
A higher machine speed can increase the number of times the diamonds pass over the surface, but that does not automatically result in a higher material removal rate. If the speed is too high for the tool or floor condition, the diamonds may not work efficiently and the tool can generate more heat or wear unevenly.
On the other hand, a very low speed may reduce productivity and change how the tool interacts with the concrete.
The objective is to find a speed that allows the diamond grinding tools to work efficiently while maintaining stable contact with the floor.
What Affects the Right Grinding Speed?
Several factors should be considered when setting the machine speed.
Grinder and Tool Design
Different floor grinders and diamond tools are designed to operate under different conditions. Tool diameter, segment design, and the machine's operating range can all affect the suitable speed.
Always stay within the operating range recommended for the specific grinder and tooling rather than assuming that one RPM works for every setup.
Concrete Condition
The concrete itself also affects grinding performance.
Hardness, aggregate, surface condition, and the amount of material that needs to be removed can all influence the appropriate speed. A setting that works well on one floor may produce different results on another.
Grinding Stage
Speed requirements can also change as the project progresses.
Initial grinding and heavy material removal may require a different setup from surface refinement or later polishing stages. The machine should be adjusted according to the work being performed rather than using one setting throughout the entire project.
How Do I Know If the Speed Is Suitable?
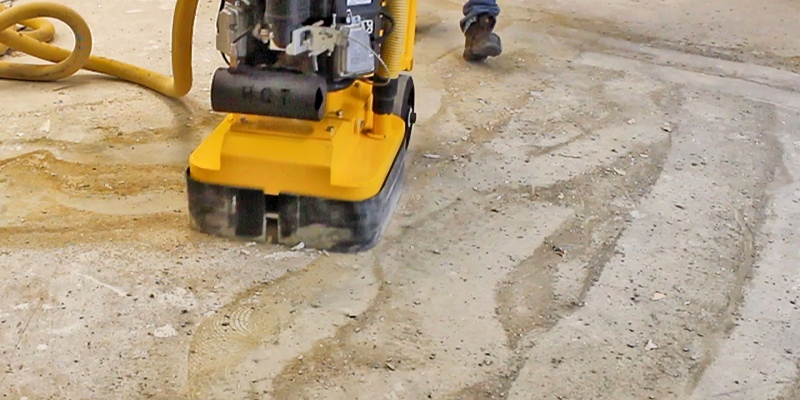
Pay attention to the actual grinding results rather than relying on speed alone.
A suitable setting generally produces:
If the tool is glazing, wearing unevenly, or producing excessive heat, changing the speed may help. However, these symptoms can also be related to bond selection, grinding pressure, or the concrete condition, so speed should not be adjusted in isolation.
Should I Change Speed During a Grinding Project?
Yes, when the working conditions change.
Different stages, tools, or floor conditions may require different machine settings. For example, a speed that works well during coarse grinding may not be the most suitable setting when using finer concrete grinding tools.
Make adjustments gradually and observe how the tool responds. This is generally more useful than making a large speed change without checking the grinding results.
Getting Better Results From Diamond Grinding
The right speed for concrete grinding is the speed that allows the grinder and diamond tool to work efficiently under the actual floor conditions. There is no universal RPM that should be used for every concrete grinding job.
For consistent results, match the machine speed with the tool design, concrete condition, grinding stage, and operating method. When these factors are properly matched, diamond grinding tools can maintain more consistent performance and wear more evenly throughout the job.
There is no fixed pressure setting that works for every concrete grinding project. The correct grinding pressure depends on the machine, diamond tool design, concrete condition, and grinding stage. In most cases, the goal is to apply enough pressure for the diamonds to work effectively without causing excessive wear or reducing grinding performance.
More pressure does not always mean faster grinding. The best results come from finding the right balance between pressure, tool performance, and floor conditions.
Does More Pressure Make Concrete Grinding Faster?
Not always.
Increasing pressure can improve contact between the tool and the concrete surface, but excessive pressure may create problems such as:
When too much pressure is applied, the diamonds may not work in the most effective way because the tool is being forced against the surface instead of allowing the diamonds to grind properly.
A properly selected diamond grinding tool should be able to remove material efficiently without relying on excessive pressure.
What Factors Affect Grinding Pressure?
The ideal pressure depends on several conditions.
Machine Weight
The weight of the grinder affects the amount of pressure applied to the floor. A heavier machine may already provide sufficient force, so additional pressure may not be necessary.
Concrete Condition
Concrete hardness and surface condition have a major influence on grinding performance.
Hard concrete may require the correct bond selection to keep diamonds exposed and working effectively. Soft concrete may require a different approach to avoid unnecessary wear.
Pressure should work together with the correct diamond tool selection rather than being used to compensate for an unsuitable tool.
Grinding Stage
The required pressure can change throughout a project.
Heavy grinding for material removal may require a different approach compared with surface refinement or polishing stages. Using the same pressure for every step may reduce efficiency and affect tool performance.

How Can I Find the Right Grinding Pressure?
The best way to determine the correct pressure is to observe how the tool and floor are responding during grinding.
If the tool wears too quickly or the grinding performance is poor, adjusting pressure may help. However, it is also important to check whether the tool, bond, and grit are suitable for the actual application.
Using the right concrete grinding tools for the job is often more effective than simply increasing pressure.
Tips for Better Grinding Performance
To improve grinding results and tool life:
The most efficient grinding process is not the one using the highest pressure. It is the process where the tool, machine, and concrete conditions are properly matched.
Choosing the Right Grinding Approach
The correct pressure for grinding a concrete floor is the amount needed to keep the diamond tool working efficiently without causing unnecessary wear. Since every project has different conditions, pressure should be adjusted based on the actual floor, machine, and tool performance.
By combining the right pressure with proper tool selection and grinding methods, contractors can achieve more consistent results, improve efficiency, and extend diamond tool life.
The best way to extend the life of diamond grinding tools is to use the right tool for the specific concrete condition, choose the correct bond, and operate the grinding machine properly. Diamond tool life is not only determined by the tool itself. Factors such as concrete hardness, grinding pressure, machine settings, and working methods all affect how long a tool can perform effectively.
A properly selected and operated diamond grinding tool can provide better grinding performance, more consistent results, and a longer service life.
Choose the Correct Bond for the Concrete
Bond selection is one of the most important factors affecting diamond tool life.
Diamond grinding tools use different bond formulations because concrete conditions vary.
For example:
Using the wrong bond can cause problems. A bond that is too soft may wear away too quickly, while a bond that is too hard may prevent the diamonds from being exposed and reduce grinding efficiency.
Choosing the correct bond helps create a balanced wear rate and allows the tool to work effectively throughout the project.
Use the Right Tool for the Application
Different grinding jobs require different diamond tools.
Factors such as:
should be considered before selecting a tool.
For example, a tool designed for heavy coating removal may not be the best choice for surface refinement. Using a tool outside its intended application can increase wear and reduce performance.
Matching the diamond tool to the actual job condition helps avoid unnecessary tool consumption.
Avoid Excessive Grinding Pressure
More pressure does not always mean faster grinding.
Excessive pressure can increase:
In some cases, reducing pressure allows the diamonds to cut more efficiently and improves tool life.
The ideal grinding pressure depends on the machine, tool design, and concrete condition. Proper pressure helps maintain a consistent wear rate without putting unnecessary stress on the diamond segments.
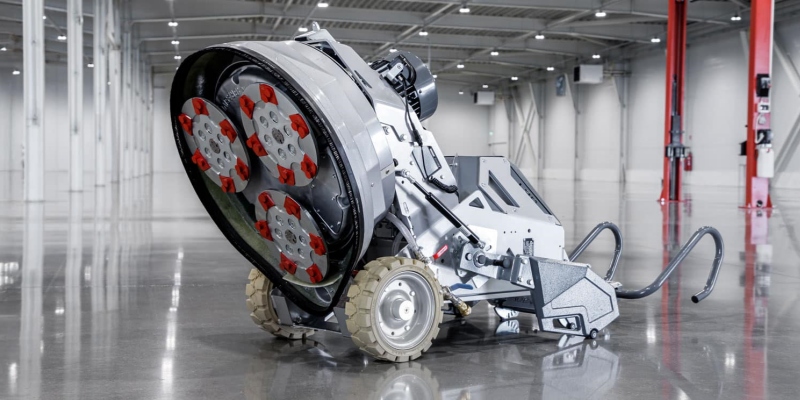
Maintain Proper Machine Operation
Machine settings and operating methods also affect diamond tool life.
Important factors include:
Keeping the machine moving consistently helps the tool wear evenly. Staying too long in one area can create uneven wear and reduce the usable life of the tool.
Regularly checking the grinding results also helps identify whether adjustments are needed during the project.
Use the Correct Grit Sequence
Using the correct grit progression helps diamond tools work efficiently.
Starting with a grit that is too fine may slow down material removal and increase tool wear. Using an unsuitable grit for the grinding stage can also affect the quality of the surface preparation.
A proper grit sequence allows each tool to perform the job it is designed for and creates better conditions for the next grinding stage.
How to Get Better Performance from Diamond Grinding Tools
Extending the life of diamond grinding tools is not about making the tool wear as slowly as possible. It is about achieving the right balance between tool wear, grinding efficiency, and surface results.
The most effective approach is to select the correct bond, match the tool to the concrete condition, use proper machine settings, and follow a suitable grinding process.
When diamond grinding tools are used correctly, they can provide more consistent performance, reduce unnecessary replacement costs, and help contractors achieve better results on every project.
Diamond tools may wear quickly for different reasons, and fast wear does not always mean the tool quality is poor. In some applications, a certain level of wear is necessary because the bond gradually releases worn diamonds and exposes new ones to maintain cutting performance. For example, a softer bond used on hard concrete is expected to wear faster to keep fresh diamonds working effectively.
However, if a diamond tool wears much faster than expected or loses performance too quickly, the cause may be an incorrect bond selection, unsuitable grinding conditions, or improper operating methods.
Understanding the reasons behind diamond tool wear can help contractors choose the right tool and improve grinding efficiency.
How Does Diamond Tool Wear Work?
Diamond grinding tools are designed to wear during operation. The bond matrix holds the diamond particles and gradually breaks down as the tool works against the concrete surface.
This controlled wear process is important because it allows new diamond particles to become exposed. If the bond does not wear at the right rate, the tool may either:
The goal is to achieve a balanced wear rate where the tool continues grinding effectively throughout the project.
Incorrect Bond Selection
Bond selection is one of the most important factors affecting diamond tool wear.
Different concrete conditions require different bond hardness.
For example:
When the bond does not match the concrete condition, the tool may not perform efficiently.
A bond that is too soft for the application can wear faster than intended, while a bond that is too hard may cause the tool to glaze and reduce cutting performance.
Concrete Conditions Affect Tool Wear
The condition of the concrete surface has a major impact on tool performance.
Factors such as:
can change how quickly a diamond tool wears.
Even two floors that appear similar may require different diamond tools because their surface conditions are not exactly the same.
Selecting a tool based only on machine type or product appearance may lead to poor performance if the tool is not suitable for the actual floor.
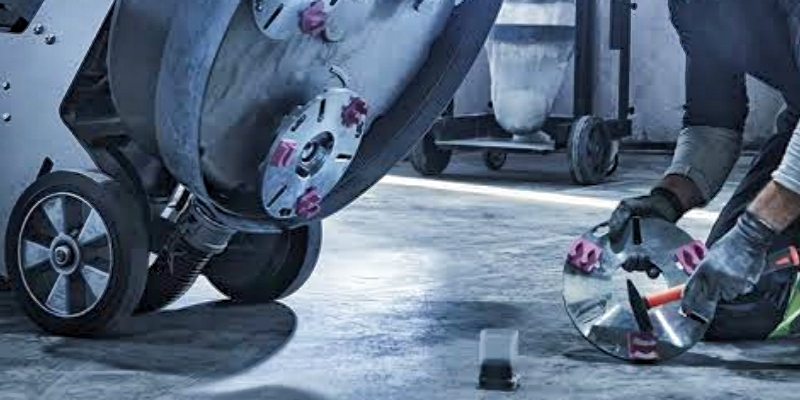
Grinding Pressure and Operation
Operating conditions also affect diamond tool wear.
Excessive grinding pressure can increase stress on the segments, generate additional heat, and accelerate wear.
However, more pressure does not always mean faster grinding. In many cases, proper machine settings and consistent movement allow the diamonds to cut more efficiently.
Factors such as:
all influence how evenly the tool wears during the project.
Choosing the Right Diamond Tool
Diamond tools wear at different rates depending on the bond, concrete condition, and grinding process. A certain amount of wear is necessary to maintain cutting performance, but excessive wear usually indicates that the tool or operating conditions need to be adjusted.
Choosing the right diamond grinding tooling helps achieve a better balance between cutting efficiency, tool life, and overall grinding results.
There is no fixed number of polishing steps required for every concrete floor. Most concrete polishing projects involve multiple stages, but the exact number depends on the condition of the concrete, the desired finish, and the polishing system being used. A simple floor may require fewer steps, while a high-gloss decorative finish usually requires a more detailed grit progression.
The purpose of each step is to refine the surface gradually, remove the scratch pattern from the previous stage, and prepare the concrete for the next level of finish.
What Are the Main Stages of Concrete Polishing?
Although every project is different, professional concrete polishing usually includes several key stages.
Surface Preparation and Initial Grinding
The first stage focuses on preparing the concrete surface before polishing begins.
Depending on the floor condition, this may include:
Coarse metal bond diamond tools are commonly used during this stage because they provide efficient material removal and help create a suitable surface for the following steps.
Progressive Grinding and Surface Refinement
After the initial grinding stage, the concrete surface is gradually refined using finer diamond grits.
The purpose of each grinding stage is not simply to move to a finer grit, but to remove the scratch pattern created by the previous step.
The exact grit sequence depends on:
A properly completed grinding stage creates a more consistent surface and reduces problems during later polishing.
Resin Polishing Stages
Once the concrete surface has been properly refined, resin bond diamond polishing pads are used to further smooth the surface and develop the desired finish.
Depending on the concrete condition and the polishing system, resin polishing may progress through different grits, including:
Not every project requires every grit step. Some floors may stop at a lower grit for a matte or satin appearance, while projects requiring a higher level of clarity and shine may continue through finer polishing stages.
How Many Grit Steps Are Usually Needed?
The number of grit steps varies from project to project.
For example:
Experienced contractors typically evaluate the surface after each stage rather than following the same grit sequence for every project.
The important question is not how many steps are used, but whether each stage has achieved its purpose before moving forward.
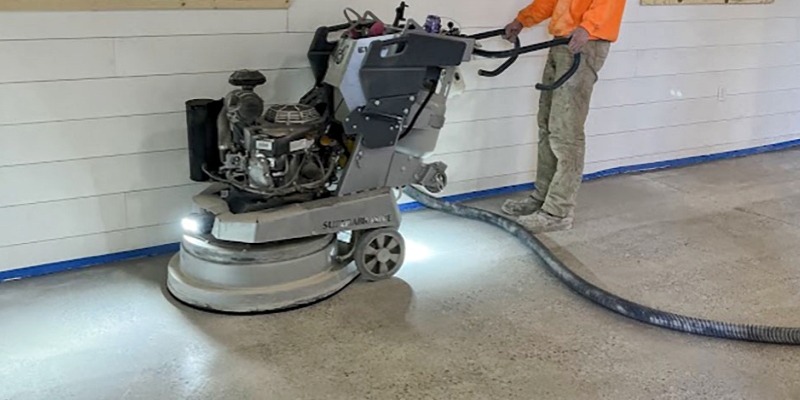
Can You Skip Some Polishing Steps?
Sometimes, but it depends on the floor condition and the desired result.
Skipping a grit step may be possible when the previous stage has already removed the deeper scratches and created a surface condition suitable for the next polishing stage.
However, skipping too many steps can leave visible scratches behind, which may become more noticeable during the final polishing stages.
A more efficient process does not always mean using fewer steps. It means selecting the right grit progression for the specific floor.
What Factors Affect the Number of Polishing Steps?
Several factors influence how many stages a concrete polishing project requires.
Concrete Condition
Rough, uneven, or damaged concrete usually needs more preparation before polishing. Floors with better initial conditions may require fewer steps.
Desired Finish
The final appearance has a major impact on the polishing process.
Diamond Tool Selection
The performance of metal bond diamond tools and resin polishing pads can affect how efficiently each stage is completed.
Using the correct tools for each stage helps create a more consistent finish and reduces unnecessary work.
Choosing the Right Polishing Process
Concrete polishing does not follow a universal number of steps. The right process depends on the condition of the floor, the required finish, and the diamond tools being used.
A successful polishing project is not about completing the maximum number of steps. It is about making sure each stage properly prepares the surface for the next one.
By following a suitable grit progression and using the right diamond polishing tools, contractors can achieve a more consistent finish, improve efficiency, and reduce the risk of visible surface defects.
Some diamond polishing pads can be used for both wet and dry polishing, but not all pads are designed for both applications. Whether a polishing pad can be used wet and dry depends on its construction, resin formulation, and the manufacturer’s recommendations. Using a pad in the wrong condition may reduce performance, shorten tool life, or affect the final finish.
Choosing the correct polishing method is important for achieving consistent results and getting the expected performance from diamond polishing pads.
What Is the Difference Between Wet and Dry Polishing?
Wet and dry polishing use diamond abrasives to gradually refine the concrete surface, but the working conditions are different.
Wet polishing uses water during the process to reduce heat, control dust, and provide cooling for the polishing pad. It is often preferred when longer tool life and better temperature control are important.
Dry polishing does not use water and is usually performed with a suitable dust collection system. It can be more convenient for indoor projects where slurry cleanup is not practical.
Neither method is always better. The right choice depends on the polishing pad design, job conditions, and the required finish.
Can All Diamond Polishing Pads Be Used Wet and Dry?
No. Some polishing pads are designed specifically for wet use, while others are developed for dry applications or both wet and dry operation.
A pad designed only for wet polishing may rely on water for cooling and lubrication. Using it dry can create excessive heat and may cause faster wear or inconsistent polishing results.
Pads designed for wet and dry use are made to maintain consistent performance under both wet and dry polishing conditions.
Before changing from wet to dry polishing, or the other way around, always confirm that the pad is suitable for the intended method.
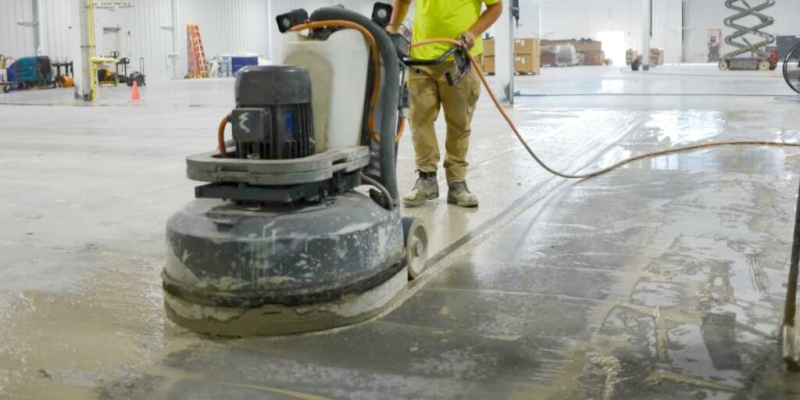
When Should You Choose Wet or Dry Polishing?
The choice between wet and dry polishing depends on the project requirements.
Wet polishing may be a better option when:
Dry polishing may be preferred when:
In some projects, contractors may use different methods during different stages of polishing depending on the floor condition and desired result.
How to Get Better Results from Diamond Polishing Pads?
Before starting a polishing project, consider:
Using the right polishing method helps diamond pads work more efficiently and creates a more consistent surface finish.
Choosing the Right Polishing Method
Diamond polishing pads can be used wet and dry only when they are designed for both applications. The best choice depends on the pad design, concrete condition, working environment, and project requirements.
Rather than choosing wet or dry polishing based only on preference, match the polishing method to the tool and the job conditions. This helps improve polishing performance, extend pad life, and achieve more predictable results.

 IPv6 network supported